Obtain your subscription link#
Register and Log in your free account on the user page. You will see a button, “subscribe”, on your user panel. Upon Openning the link, you will get your own subscription link.
Start the client#
Uncompress the downloaded file to a directory.
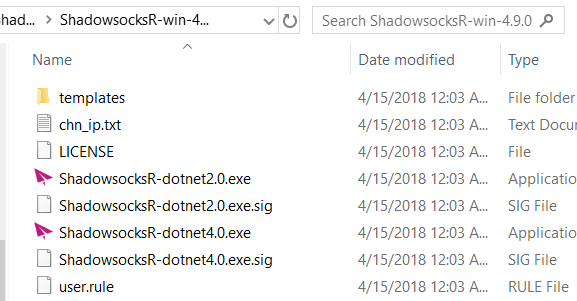
There are two versions
- *-dotnet4.0.exe (windows 10)
- *-dotnet2.0.exe (xp, windows 7)
Start the client, you will see a paper plane icon in your system tray.
Right click the icon, you will get the menu popped up.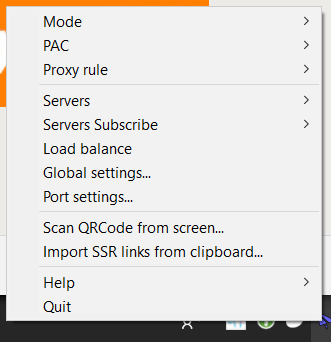
Enter your subscription link#
Within the menu, select the “Servers Subscribe -> Subscribe Setting”.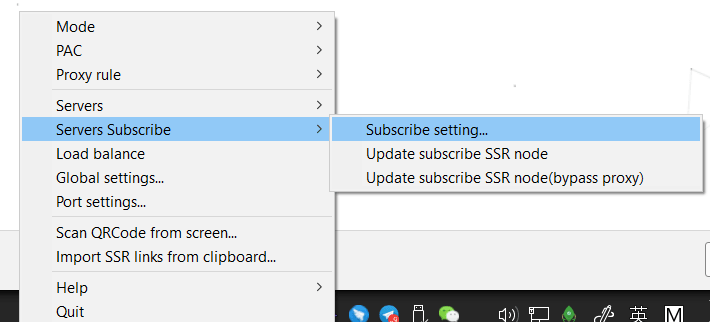
Add the subscription link you just obtained in the window popped up. Make sure that you enabled the auto update option. And click “OK” button.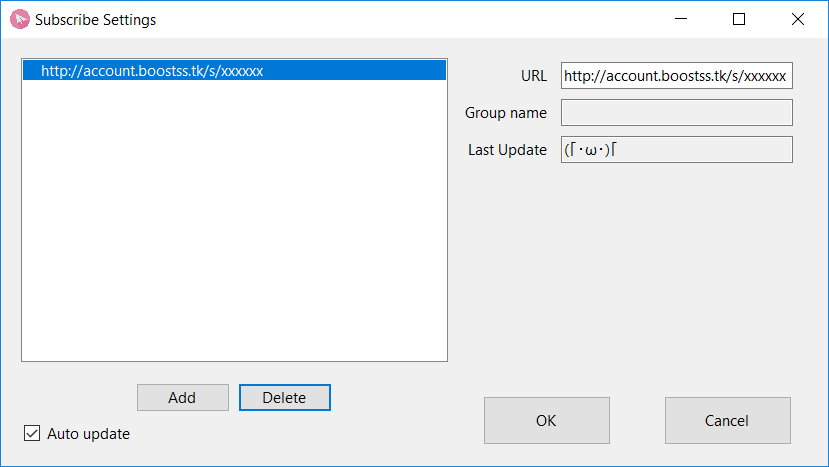
Update servers subscription#
Within the menu (again), you select the “Servers Subscribe -> Update Subscribe SSR node(bypass proxy)”. This will update the servers through your subscription link.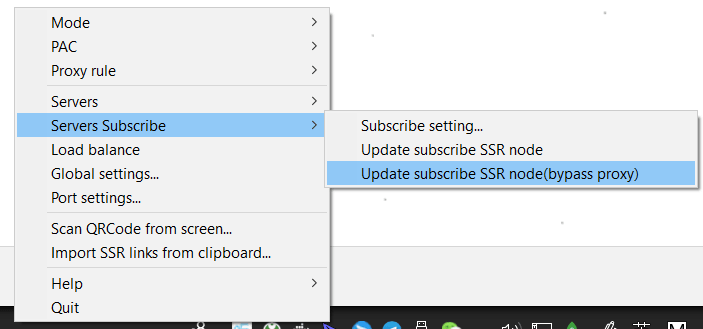
Once succeeded, you will see servers updated in the submenu of “Servers”
Select your server#
Within the menu (again), choose and enable one server in the submenu of “Servers”.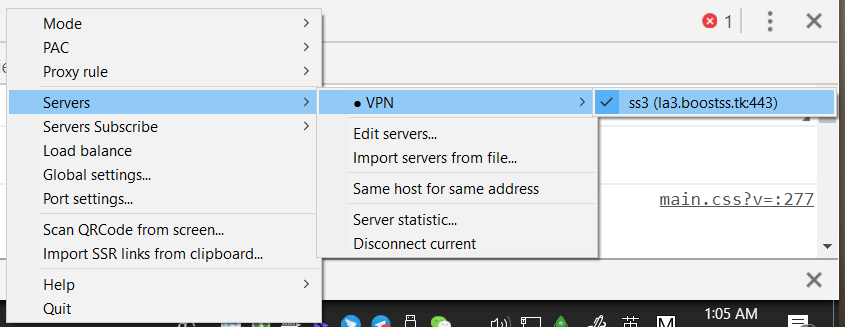
Run#
Within the menu, enable “Mode -> Global”.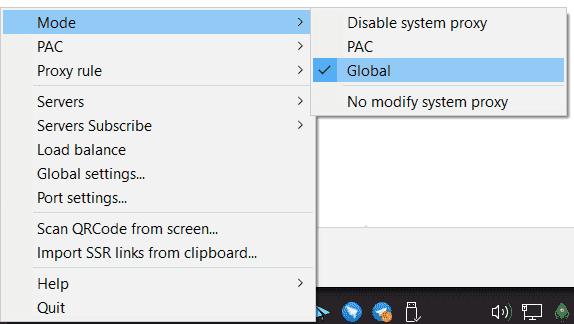
Optimize (optional)#
Within the menu, make sure that “Bypass Rule -> Bypass LAN & China” is enabled.
Then enable “Mode -> PAC”.
Now, you are good to go.